
When Tales from the Yawning Portal was first announced, I looked at the roster of dungeons and adventures that could be featured within and had a grin from ear to ear when I saw the words: “Tomb of Horrors.” An infamous dungeon crawl penned by Gary Gygax as a meat grinder of an adventure. Gygax had built the experience with the intention of reminding his high-level players of their mortality. This adventure has a way of showing how fragile a player-character (PC) could be, traps that tormented the players tricked them, or outright slaughtered them. There were plenty of ways to die in the Tomb of Horrors, very few ever have the distinct pleasure of besting it. Especially since the tomb is guarded by layers of traps and misdirection, the perfect resting place for a powerful entity like the lich Acererak.
Most of my players read Ernest Cline’s Ready Player One, where the main protagonist goes through the legendary dungeon. My players knew of the dungeon and stories of possible death that awaited any character brave enough journey deep within the lich lord Acererak’s lair. This is our story, along with some advice for preparing your own game in Tomb of Horrors. Warning: there are plenty of spoilers, so you have been warned.
You can purchase a copy of Tales from the Yawning Portal here.
Preparing the Dungeon
The Tomb of Horrors is the final resting place for the powerful lich Acererak. The lair of such a powerful being will naturally be littered with traps and possibly monsters. Gary Gygax wrote the Tomb of Horrors adventure as a means to humble his players who’ve grown arrogant and boisterous of their prowess within the game, many were at very high levels. It’s encouraged that you let your players have the same sense of arrogance and empowered demeanor.
The experience is supposed to slaughter them, so definitely feel empowered. It’s also suggested that players should have at least two character sheets, just in case. A more reckless group of players will more than likely need a few more character sheets compared to a paranoid bunch. Team BAJA is a paranoid group of players, namely from my years as a Dungeon Master with much more nefarious traps than some found this adventure.
But I don’t lie; there are much more save or die traps than I craft for my games. When you’re running a campaign, you usually don’t want to slaughter your players. You wish to maim them. In a one-shot such as Tomb of Horrors, you should be encouraged to kill them. Remember, this is a tomb that’s meant to keep intruders out, so the traps are expected to be perilous and unforgiving.
Tomb of Horrors is a thinking-man’s sort of dungeon, lots of puzzles and hidden passageways. Some traps require smart ways to safely dodge them or escape from them.
Make sure to read the entire dungeon and adventure, so you mean to understand the clues, riddles, and puzzles that lurk within.
The intro section for the adventure has some great tips on how to remain in a neutral tone of voice. You don’t want to give away the traps or the tricks, you want the players to make the poor choices themselves.
Players and their Characters
When deciding on what level to have your players run through Tomb of Horrors, the best suggestion I found was around 10th level and above. Understand that once you reach 15th level, the DCs for many of the traps slowly become less and less impactful. The best range is ideally 10th to 12th level. Most 10th level casters will be maimed by the traps alone, the tanks and martial characters will take longer to widdle down, but the damage will stack up.
In regards to magic items, you have several routes.
- You can have a no magic item way, which I would treat as a “meat grinder” sort of affair.
- You can let the players choose whatever magic items they want from the Dungeon Master’s Guide with your final authority to take an item away from their list. It’s partially for balance reasons but more so for the players to make solid item selection choices. (This is a preferred option)
- You can also craft a list of magic items that you would allow the players to acquire and restrict the quantity and rarity. Just have a plan and a decision regarding magical items. I don’t suggest letting your players having access to legendary rarity or artifact quality items. (I used some of this)
Feats? If you want to include them, then include them. It’s not my game, but they are optional rules if you wish to add them. Be mindful that Dungeon Delver can create a tedious amount of rolls. Best restrict that one to only one character in a group.
Entering the Tomb of Horrors
Once you have yourself prepared, your maps are drawn (I highly recommend it), and your players are alls statted and geared; the real fun finally begins. I also suggest you photocopy the monster stat-blocks for the various encounters that can and will spawn in this dungeon. It saves you time from fiddling with the Monster Manual or the Tales from the Yawning Portal book itself. I also suggest keeping a copy of the map as well for reference. Warning #2: This is super spoiler territory, you have been warned.
Since this dungeon crawl involves loads of exploration and puzzle solving, I highly recommend the party rolls their Initiative at the start of the adventure and follow the initiative order to help keep the pace moving. The players are encouraged to converse with each other with how they wish to proceed, but if they get stuck, it’s okay to give a few hints occasionally. After running the adventure, I had conceived of a mechanic similar to the dark dice (read our modifications on the Death House one-shot experience here) and will probably run this mechanic in the future when the party wishes a hint or a clue from the universe (a.k.a the DM).
If you have the pleasure of torturing your party with the two false entrances, the group may become even more wary of exploring the dungeon. The pit traps in the main hallway can severely injure or knock unconscious an unfortunate spellcaster or hurt a fighter quickly. Once the party acquires the parchment from Acererak that is essentially an elaborate riddle to traverse the tomb itself and find the treasure deep within. There are only really two areas where the party can advance further into the tomb. Otherwise, players will reach the end of the hallway and find the stone archway. If they solve the combination, they should be able to teleport to the room with the four-armed gargoyle. The only problem is if the party doesn’t have any gems in their possession, initially, the puzzle requires ten gems sacrificed, you can take any gold from the players to pay this gargoyle but if they don’t have enough they are left stranded and will most likely die after a few days. Most players don’t instinctively think of a secret entrance at the bottom of a pit trap, well that’s the location of the second route into the tomb.
Eventually, the party will find one way or another reach another hallway of similar size as the one they entered. This time there are frescoes of anthropomorphic humanoids along the walls. There are also trapped doors that produce an array of spears and spikes that shoot out toward any adventurer foolish enough to open them. This hallway has several crawl spaces available that lead to smaller rooms, one with treasure and monsters, and one that sort of leads to nothing substantial. I will tell you, fighting an ogre skeleton in a small 30 by 30-foot room is quite difficult.
The most important aspect about this dungeon, from a DM’s perspective, would accept when the party doesn’t bother to check bodies or rooms thoroughly. That will slow their progress substantially, especially when they need to collect the two keys that are featured throughout this dungeon. The chapel or temple room has an interesting mechanism for killing a few foolish adventures. But my favorite part of the room? Another stone archway with thick magical mist. The difference? Once inside, the characters’ alignments change to the complete polar opposite. Lawful Good turns into Chaotic Evil. For True Neutral, I rolled for the new alignment. If you do not prefer using the alignment system, I suggest adding flaws to the characters while they’re inside the mist. My other favorite aspect? A party member has the chance to change genders. It’s hilarious and often leaves players dumbfounded.
There are a couple of traps beyond this point that can result in absolute death for a player character, one of them is a locked oaken door that has music playing if someone presses their ear on it to listen. When they reach inside the tunnel, they will realize they’re on a counterweight beam, and it’ll be a race to get back to safety. But death is possible for the unfortunate, especially since they will fall prone and slide 10 feet closer to their doom. Falling prone and getting back up requires half of a character’s movement speed. An average character will lose 15 feet and use the other 15 to run out, sadly the length of the beam is 50 feet long. You’re going to have some panicked players; it’s going to be sweet music to your ears.
Once the party reaches into to the room with a greater zombie that falsely impersonates Acererak. A well-equipped party will easily defeat this undead menace and probably deduce that it was a false lich and that the true Acererak awaited them somewhere else. A party with low or no magical items may consider this undead to be the true foe. But most players will conclude that the true lich rested somewhere deeper within the tomb. After searching for a highly well-hidden passageway, the rest of the tomb can be explored.
There’s a portion of the dungeon that deals with one-way doors and a Siren that will help the players get out. It’s an exciting puzzle challenge. If your players do find themselves interacting the Siren, expect a good amount of time devoted to trying to find a way out. I would warn that a party shouldn’t be stuck in this puzzle too long, it can get frustrating after a certain amount of time. Make sure you gauge the temperament of your players if you see distress you may want to consider giving a hint or remind them of information they have possessed.
When the party makes their way into the Throne Room, this is the point of no return. Once they manage to open the large adamantine door, there can no turning back. The party will be trapped and have to deal with the horrors that unfold afterward. If the party manages to find the cursed gem, you’re in for a real treat. It’s a gem with the wish spell inside, but with a huge twist, it produces a twisted and distorted reality when fulfilling the wish that will bring harm to the character and all named in the wish. The best part about the gem? After fulfilling the wish, the gem will explode and kills anyone within the 15-foot blast radius. Talk about an easy TPK, right? Imagine how desperate the players will be when they face Acererak, it’ll be a magical moment. Team BAJA did find this gem, and the Sorcerer in the group decided to keep it but not share the information about the item with the party. Ultimately, one of the other party members decided to steal the shiny gem from him. It was a magical moment, especially for what awaits them later.
Once the party finds their way from the throne room with the scepter and crown in hand, they should find their way to an ornate foyer. The best part of this puzzle will be the players trying to figure the “true” key to open the mithril doors. Damaging the door has a unique consequence, blood flows from the damaged part of the door. I love drowning characters and traps that do so, what does that say about myself? Anyway, the variety of ways for the party to just escalate the situation is phenomenally hilarious. Seriously, take a look at it. Once the party figures out that the golden knob of the scepter will open the doors, they will find themselves in the second to last area of the tomb and their awaited doom.
The false treasure room is just filled with traps, especially in the iron chests that have purple wurm poison. The bronze urn has an efreeti that can be summoned but will be angry if the urn has been disturbed. The efreeti can be a powerful ally for the players for it grants three wishes if released in a pleasant mood. Beyond this room will eventually be the place where the players find a place to insert the “key” into a slot. Upon activation, cautious players would do so far away with magic or rope. Otherwise, you will be short at least one character. Those foolish enough to disturb the remains or treasure within the mithril vault will incur the wrath of the floating skull of Acererak.
Tips running the final battle with Acererak
Acererak is a powerful demilich (as per the Monster Manual plus the Trap the Soul action) if you went the meat grinder, no magic item route game; the characters will fall fairly quickly since non-magical weapons will be resisted.
- For more equipped parties, the various array of lair actions, legendary actions, and powerful actions will cause characters to scatter. All of this makes it easier for Acererak to focus on a single target and trap their souls.
- Use Trap the Soul when you want to deal with tanks and other troublesome characters like other spellcasters.
- Dealing with the likes of Bards, Paladins, Warlocks, and Sorcerers, most of them can be addressed by reducing their hit point maximum from the Energy Drain legendary action.
- Use the Howl action to scatter the characters if they try to gang up on Acererak.
- If Acererak is running low on health, use the Life Drain action. It’s terrific when surrounded.
- Play Acererak aggressively and as tactically as possible. He’s an all-powerful demilich with centuries of skill and knowledge, act like it.
- The frightened condition is a powerful asset if the party doesn’t have a Paladin.
- Kill the Paladin and Clerics first.
- Use Vile Curse legendary action to set up for a next turn Trap the Soul action.
- Remember your lair actions. They can ruin a party’s day.
The demilich will indeed kill several characters, but if your party is fortunate enough, they can defeat the ancient undead.
How did Team BAJA fair?
Well, Team BAJA didn’t lose a single character, until they faced the dreaded Acererak. The combat rounds were long and lengthy, which is understandable when players are trying to find actions that work in their favor but such a powerful entity will ultimately deflate some of their ideas. While it was a battle of attrition and them running for dear life, their first characters would their fate. We didn’t get a chance to enjoy the second batch of characters, namely because we had played a cumulative 12 hours in Tomb of Horrors and opted to return to our regular campaign. It was a trying time for the players, but they were glad to have the experience finally. Gary Gygax’s legacy endured and was well received. There are plenty of memorable moments for us from the tabletop that we (as a group) will never forget.
Final Impressions
Just like any published adventure, it’s important that the Dungeon Master spend the time to prepare for the adventure. Tomb of Horror is a unique experience, and honestly, requires, a fair amount of dedication and preparation. Once your players go through it once, the magic and allure will not be the same the second time around. So it’s important that a Dungeon Master makes an effort to grant a memorable experience.
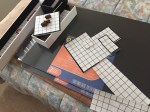
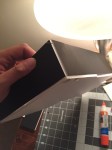
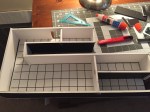
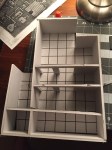
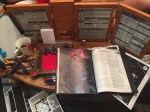
What did I do to make my player’s first experience with Tomb of Horrors memorable besides tormenting them? I made most of the dungeon out of foam core. I also had someone cater for us. Check out the photo gallery below.


It was also the first time the Team BAJA players ever sat longer than 4 hours to play Dungeons & Dragons, they finally experienced an entire day of gameplay. It was an ordeal, it was exhausting, but it honestly harkened back to my early years with the game. While it was their first time, it was like walking down memory lane. This is why I love this game, the memories we make are so important and precious. Enjoy the time, make it into an event. Embrace the madness and death that ensues. Most importantly? Have fun.
If you want to pick up a copy of Tales from the Yawning Portal, click here.
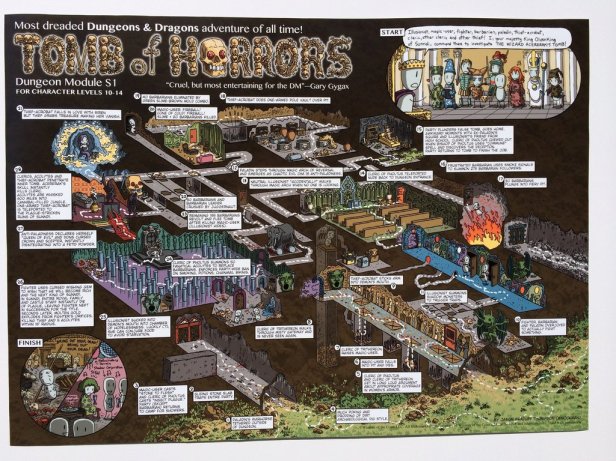
If you want that cartoon walkthrough map of the Tomb of Horror by Mockman, click here.
There are other memorable and iconic dungeon crawls inside, pick one up and relive some of the best of D&D’s history.
Thanks for reading! Please like, comment, and share. If you want to keep up to date with us, please follow us on Facebook and Twitter. We have an Instagram for behind-the-scenes Team BAJA campaign pics and boardgaming fun. If you want to support us, please check our Patreon. If you have any questions or inquiries, please email me at archmage@deathbymage.com. Thanks again and we’ll see you soon!
